Each Vault has a data model consisting of objects, their fields, and their relationships. Object records are pieces of data within this model. For example, Product is a standard Vault object, while WonderDrug is an object record for that object.
Accessing Object Records
You can work with object records from Business Admin > Objects or from object tabs. For details see Accessing Object Records.
How to Create or Edit Object Records
To create a new object record or edit an existing record:
- From a custom object tab or Business Admin > Objects > [Object Name], click Create or open the object record and click Edit.
- When creating a new record, select an object type if prompted.
- Fill in details for the object record. These vary based on what Admins have set up for the object. Depending on your Admin’s configuration for the object, there may be default field values that appear when you either create or save your object record.
- Optional: To prevent users from selecting this object record, you can set the status to Inactive. If the object is otherwise set up, users will be able to select all Active object records.
- Click Save. To create another object record, click Save + Create. Vault will open a blank object record instead of displaying the saved object record.
- Optional: To create records and stay on the same page, enable the Create records in pop-up dialog option for a custom tab or related object section.
When editing a record from the object record details page, the Save button is only clickable after you update a field value. If you decide not to edit any fields, click Cancel to exit edit mode.
Additionally, if you are editing a text field with a maximum length more than 128 characters, Vault automatically resizes the field to accommodate your entire entry.
Note: Formula field values (including icons) are not editable by any security profile. Vault calculates these values when you save an object record.
Other Ways to Create Object Records
You can create object records by:
- Copying existing object records
- Using a Create Related Record user action on a document
- Creating object records from related object sections
- Clicking Create > User Task in the menu bar (User Task-class object records only)
Record Status & Record States
For objects that use lifecycles, you cannot change the Status for a record directly. To make a record active or inactive, you must move it into a lifecycle state associated with that status. For example, Approved state would correspond to Active status, while Retired would correspond to Inactive status.
Actions to move an object record depend on your Vault’s configuration. For example, the Vault configuration may allow you to directly move a record from Draft to In Review status with a user action from the record’s Actions menu. For another object, you may need to start a workflow on the object record that will collect signatures before moving the record to In Review. In some cases, object records will move into new lifecycle states based on a scheduled job, or on actions that another user takes on a related object record. The actions that are available depend on object-level security, record-level security, and object configuration.
Default Field Values
Default field values may be specific values configured by an Admin, or a calculated value based on a formula.
Empty, required object reference fields that reference an object with a single record default to reference that single object record. For existing object records, those fields will only default when editing the record from the object record details page, and not when inline editing from the object record list page. In addition, these fields do not default when creating records for join objects using the Relate Multiple Records option.
Create Records in Pop-Up Dialog
The record creation dialog box allows you to create records without leaving the list view in a custom tab or the related object section of a source object.
To enable the dialog box when creating object records from a custom tab:
- Navigate to Admin > Configuration > Tabs > [object].
- Enable the Create records in pop-up dialog option.
When creating object records from a custom tab that has this option enabled, you will enter record details in a pop-up dialog box rather than on the new record’s details page.
When you click Save, Vault creates the record and keeps you in the list view of object records. Clicking Save + Create creates the record and brings up a new dialog box to create another record.
To enable the dialog box when creating object records from a related object section:
- From an object’s page layout, click the pencil icon on a related object section.
- Enable the Create records in pop-up dialog option.
How to Change Object Types
If you’re working with an object that uses object types, you may sometimes select the wrong object type for a new record. To associate an object record with a different object
- Open an object record.
- From the Actions menu, select Change Type.
- Select the new object type and click Continue.
- Enter field values where needed. You’ll lose the values in any fields that are not associated with the new object type, but Vault preserves the current values for any common fields. Vault does not apply field defaults configured on the new type.
- Click Save.
Related Records
Related object sections can display child or referring object records in a relationship with the record you’re viewing.
You may also see the Show in Tab link, which opens the related list in a custom tab. This option only appears for objects with custom tabs.
It’s possible to create and relate object records without leaving the context of the original record. This option is available for:
- Objects related through an object reference field
- Objects related through a simple join relational object
- Objects related through a complex join relational object, if enabled for that object
- Documents, by using an object reference field on the document
For example, Teresa is creating Study Person records for her team members. Teresa must fill the Study Team Role field for each team member. She may need to create a new Study Team Role reference record for her team member Robert’s role. She can create and relate a record directly from Robert’s Study Person record, using a related object section in the page layout.
Note: Relating records is not available on related object and document sections configured to filter related lists.
Creating Records from Related Object Sections
The object layout configuration controls options for creating related objects. In some related object sections, the configuration blocks creation of new object records. Depending on configuration, new record creation may happen in a pop-up dialog, which allows you to stay in the original object record, or it may navigate you to related object record pages.
To create related object records using a related object section in an object record layout:
- Open the object record and scroll to the related object section.
- Click Create and fill in the required fields.
- Click Save.
Vault enforces object type filters when you create records from related object record sections. For example, if an Admin sets the object type filter on a section to include only the Pharmaceutical and Medical Device object types, you would only be able to create records of those object types from this section. Vault applies all filters that an Admin has configured, but only displays fields that you have Read permission on.
If enabled, Vault can default field values associated with the equals and includes filter operators on records created from related object sections. For example, if you set a related list filter for a Product picklist to equal “Cholecap”, Vault will populate that picklist with “Cholecap” when you create a record from the related object section. Contact Veeva Support to enable default filters on fields other than object type.
How to Create a New Reference Record
To create a new reference record:
- Click into an object reference field.
- Scroll to the bottom of the picklist.
- Click + Create {Object}.
- The Create {Objects} dialog opens with the referenced object’s fields. Fill in the required fields as well as any additional fields needed.
- Click Save.
- The dialog closes. Finish creating or editing your object record.
- Click Save.
Note: Known Issue: Users without the Create permission for an object can still see and click + Create in document object reference fields. That user will receive a Page Not Found error.
You can also create new reference records after clicking the Binocular icon to search existing reference records:
- Click into an object reference field.
- Click the Binocular icon.
- Add or remove references from the object record as needed. You can hover over a reference field to see up to 1000 characters of the value of that field. Click Select All to add all available references. If you accidentally click this button, you can click Unselect All to clear all selected references.
- Click Create.
- The Create {Objects} dialog opens. Fill the required fields as well as any additional fields needed.
- Click Save.
How to Create a New Relational Reference Record
You can use the create and relate option on an object record for all simple relational objects and, if enabled, for complex relational objects. Navigate to an object record through Business Admin > Objects or a custom tab.
To create a new relational reference record:
- Open the object record and scroll to the relevant related object section.
- Click Add.
- Click Create and fill the required fields.
- Click Save.
- Click OK.
To add an existing relational reference record:
- Open an object record and scroll to the relevant related Object section.
- Click Add.
- Add or remove references from the object record as needed.
- Click Select All to add all available references. After you click this button, it appears as Unselect All.
- Click Unselect All to clear all selected references.
- The Select All option only works for the selection of 500 records or fewer.
- Click Ok.
In Vaults where two objects share the same parent object and have a relationship to each other, Vault auto-populates the parent object field when using Create to create a record for a sibling object from the context of the related record.
Note: Known Issue: In the current release, Select All does not work for RIM Vaults or for Multi-Document Change Control in Quality Vaults.
Removing Duplicate Related Records
Related object sections that reference a simple join object may contain duplicate records. This situation occurs when multiple simple join records join the same two parent records.
Duplicate records are more likely to appear in complex join related object sections with Display as Simple enabled. For example, Approved Country supports a complex relationship between Products and Country. A Products related object section is added to the Country object layout with Display as Simple enabled. Two Approved Country records join the Cholecap record (Product) and the United States record (Country). The Products related object section on the United States record displays the duplicate record.
Each record with duplicates displays a number counter representing the amount of times the record joined the two parent objects. For example, in the image below, two related Cholecap records join the Country and Product objects together.

To remove individual duplicate related records:
- Locate the related record with duplicates in the related object section.
- Select the Actions > Duplicates in the record’s row. Alternatively, you can hover your cursor over the number counter and click View Duplicates in the tooltip.
- A page displays with each duplicate related record. Click Actions > Delete in each record row you want to delete.
- Click Continue in the Delete Record dialog.
The duplicate related records are now removed. If you remove all duplicates until one record is available, the number counter in the related object section disappears.
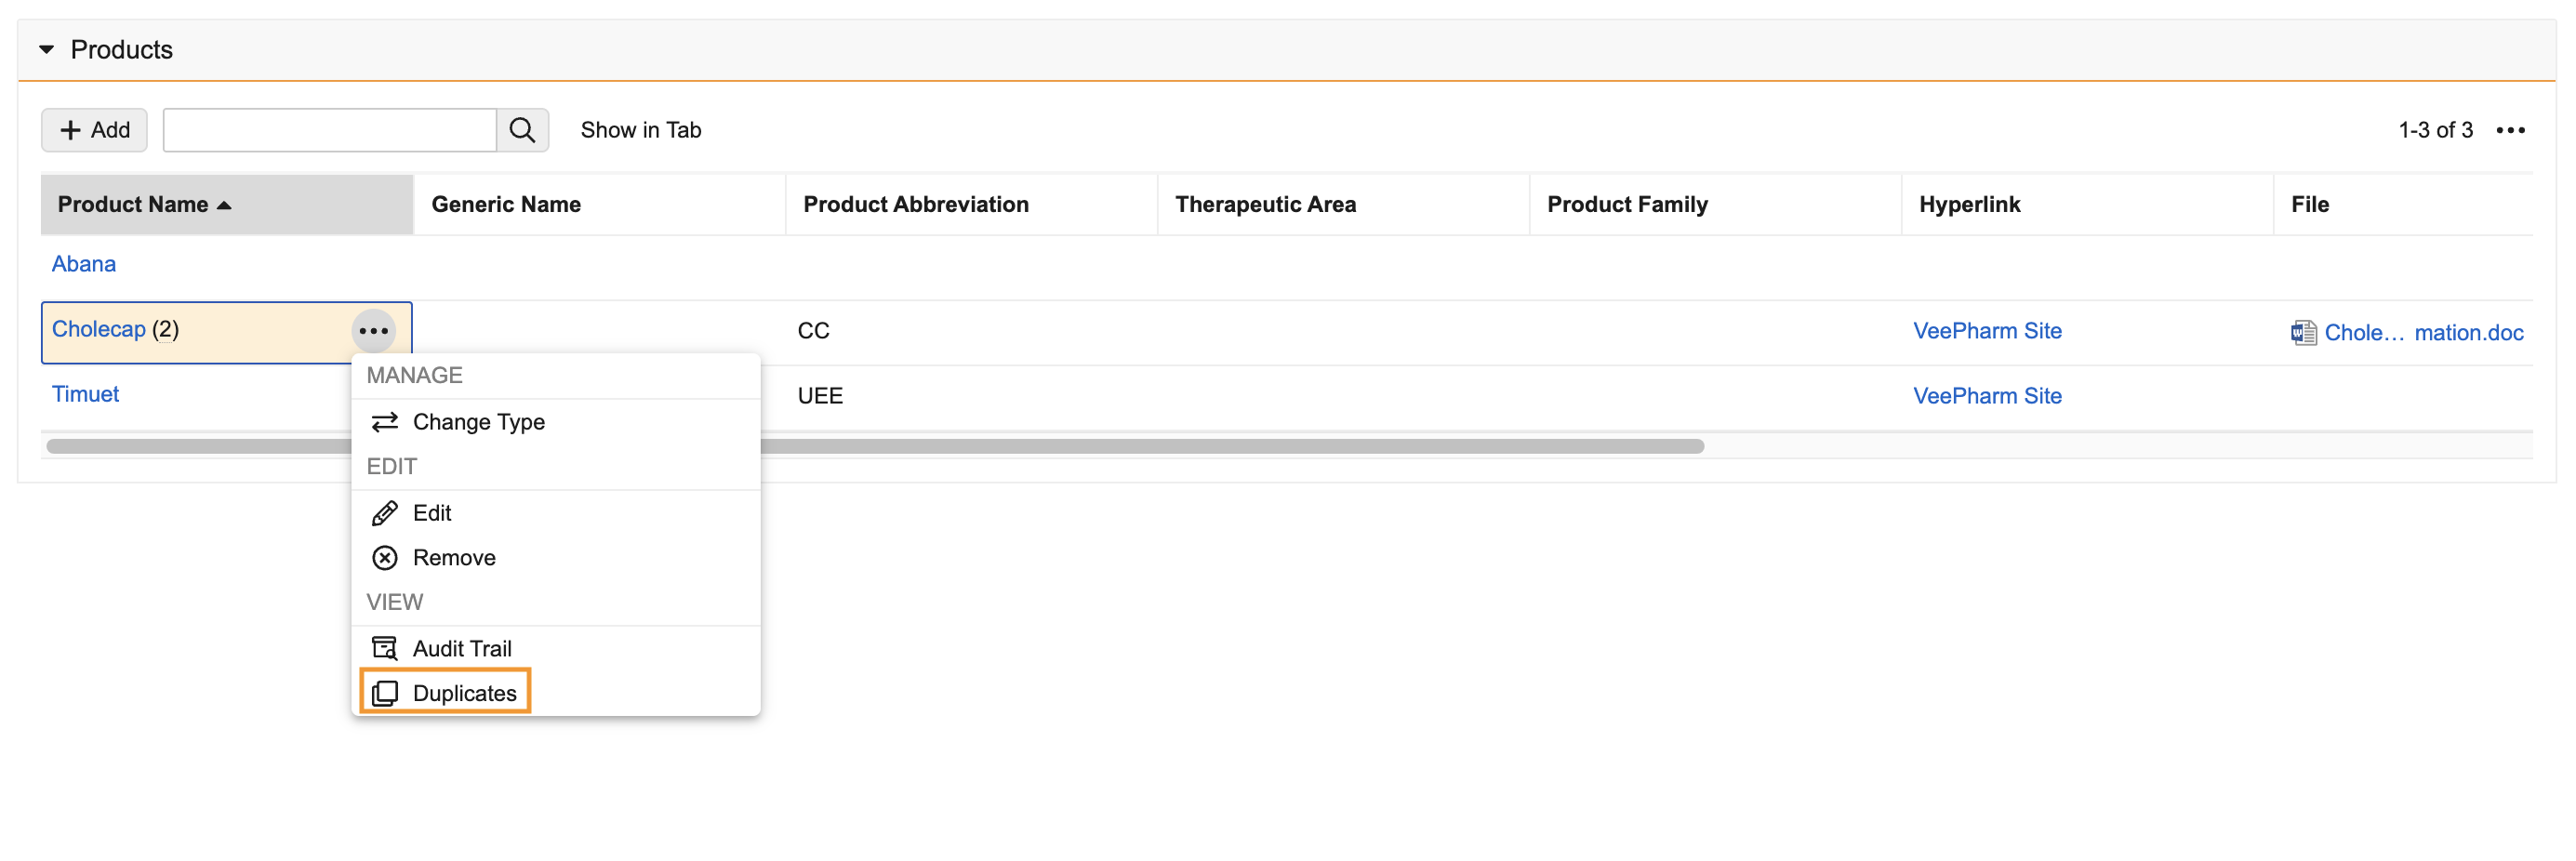
To remove all duplicate related records at once:
- Locate the related record with duplicates in the related object section.
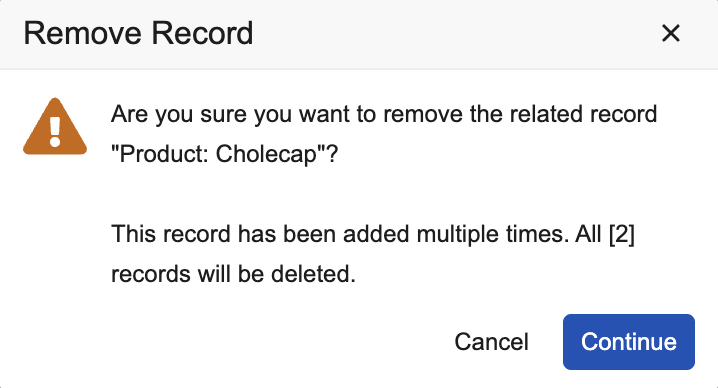
- Select Actions > Remove in the record’s row.
- Click Continue in the Remove Record dialog.
This action removes all duplicate related records. If you need one related record left out of the duplicates, you can use the process mentioned above or perform a bulk delete. The Remove action can only remove up to 500 duplicate related records at a time.
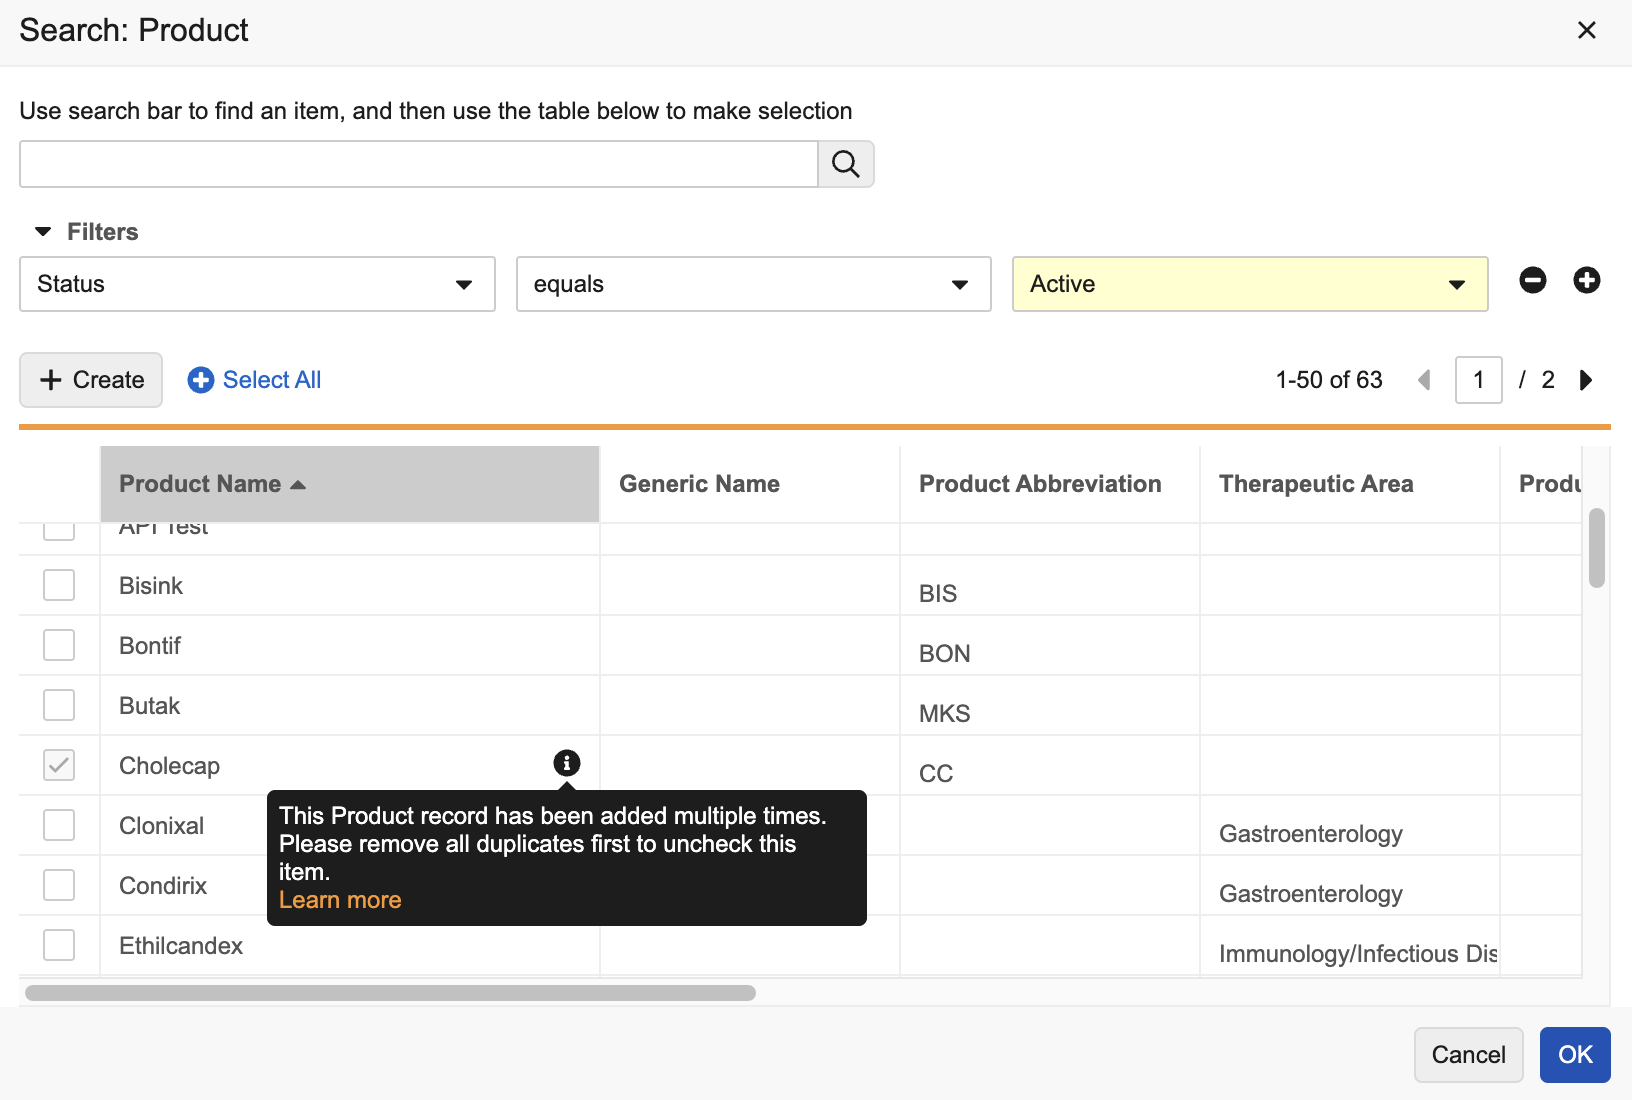
Vault disables removing the duplicate records from the Search: [Object] dialog. You must remove the duplicate records using one of the processes mentioned above. Hover your cursor over the information icon () for more details and a link to the described processes.
Note: Generated PDFs continue to display duplicate records even after they are removed from complex join related object sections with Display as Simple enabled and simple join related object sections.
Display Complex Join Sections as Simple
In some scenarios, you may need to display a complex join related object section as a simple join related object section. For example, you may need to add an external ID field to the simple join object that is not intended for use by end users. You can accomplish this behavior by enabling the Display as Simple setting when adding or editing a related object section that references a complex join object. When Display is Simple is enabled, the following changes appear in the complex join related object section:
- Name field is based on the related object and not the complex join object
- Show in Tab displays all fields from the related object, but not the complex join object
- Select All and Unselect All are available when adding related records
- The Search: [Object] dialog allows users to add and remove up to 500 records
- The complex join related object section can display up to 10,000 records
When Display as Simple is enabled, you can only add fields (columns) from the corresponding parent object to the related object section. For example, Application Country supports a complex relationship between the Application and Country objects. If Country is added as a related object section to the Application record layout, you can only add fields from Country and not the Application Country object.
Vault removes any complex join object fields in the related object section when Display as Simple is enabled.
Related Documents
There are several ways to add related documents to an object record without leaving the record:
- Add one or more existing documents. You can add any document to the record on which you have the Edit Fields permission.
- Upload source files to create new documents that relate to the record.
- Create a new document from a template, provided you have the permissions required to create document types.
Creating and relating documents this way updates the document field that creates the object relationship, for example, the document’s Product or Marketing Campaign field. An Admin must configure the object page layout to add the Related Documents section.
How to Relate Existing Documents
To relate existing documents:
- Open an object record.
- In the Related Documents section, click Add. If an Admin has configured filters on which documents can be added to this section, you must have Read permission on all fields used in the filter in order to access this section.
- The Select Documents dialog opens. Filter as needed to find your documents. If an Admin has configured filters on which documents can be added to this section, you will only see the documents that fit that criteria.
- Optional: Add additional search criteria or filters to find the correct target document. If needed, select a different standard view in the top right of the dialog. In addition to the standard Library views, you can limit the view to your Favorites, or to documents that are currently in your Cart.
- Select documents to relate to the object record by selecting their checkboxes.
- Remove documents related to the object record by clearing their checkboxes.
- Click Close.
How to Relate New Documents - Upload
You can create and relate a document by uploading directly to a Related Documents section. Note that this option is not available on Related Document sections configured to filter related lists.
To do this:
- Open an object record.
- In the Related Documents section, click Add.
- In the Search: Documents dialog, click Create.
- In the Create Document dialog, select Upload, and click Continue.
- To select files, drag and drop them into the blue area or click Choose. Uploading multiple files creates multiple documents.
- If prompted, choose whether to classify the documents with a document type immediately or later. For unclassified documents, you will skip the steps to select a document type and populate fields.
- If you chose to classify the documents, select a document type using the document type selector. This selection determines the relevant document fields, lifecycles, and workflows.
- Click Next. Vault immediately begins uploading the files and shows the progress on the page. If Duplicate Content Detection is enabled, Vault will notify you if the same file already exists.
- Complete the fields. An asterisk (*) indicates required fields. You can complete these fields before the upload completes. You can edit fields for multiple documents at one time.
- Click Save. If the Save button is disabled, the upload is not complete or required fields are blank.
The uploaded document is now available in the Library. Depending on the file size, the thumbnail and viewable rendition can take up to several minutes to appear.
How to Relate New Documents - From Template
You can create and relate a document from a template. Note that this option is not available on Related Document sections configured to filter related lists.
To do this:
- Open an object record.
- In the Related Documents section, click Add.
- In the Search: Documents dialog, click Create.
- In the Create Document dialog, select Document from Template, and click Continue.
- Select a document type.
- Choose a template from the picklist and click Next.
- Fill any required fields and other fields as necessary.
- Click Save.
Field Dependencies
Adding documents from an object record does not honor field dependencies.
Creating and relating documents from object records honors field dependencies with two exceptions:
- If the relevant object field is hidden or read-only based on the document type, Vault ignores this dependency and populates the field.
- If the relevant object field is hidden, read-only, or limited to certain values based on another field value, Vault ignores this dependency and populates the field.
Show in Tab
Click Show in Tab in a related document section to view a dynamically-generated list of related documents in a tab. Within the tab, you can:
- Apply additional filters
- Perform bulk actions
- Start multi-document workflows
- Save custom views
Multi-Document Viewer
In the multi-document viewer, you can view all documents in the Related Documents section of an object record. To view all documents related to an object record, select All Related Documents from the object record Actions menu.
How to Delete Object Records
Certain object relationships and deletion rules may prevent you from deleting an object record. See Deleting Object Records for more information.
To delete an object record:
- Open an object record.
- Choose Delete from the Actions menu.
- Click Continue on the Delete Record screen prompt.
Note: Once an object record is deleted, it cannot be recovered.
Maximum Number of Object Records
For each standard data store object, Vault allows up to 100,000,000 records. If your organization requires more records than this, consider using the Raw object data store option.